Single-Tooth Case Breakdown: Where Emergence Meets Esthetics
- Mar 3
- 2 min read
At first glance, restoring just one central incisor seems simple. In reality, these cases test your precision more than full-arch or multi-unit plans, because every nuance—cervical scallop, emergence, value, translucency—must blend seamlessly with the natural contralateral.

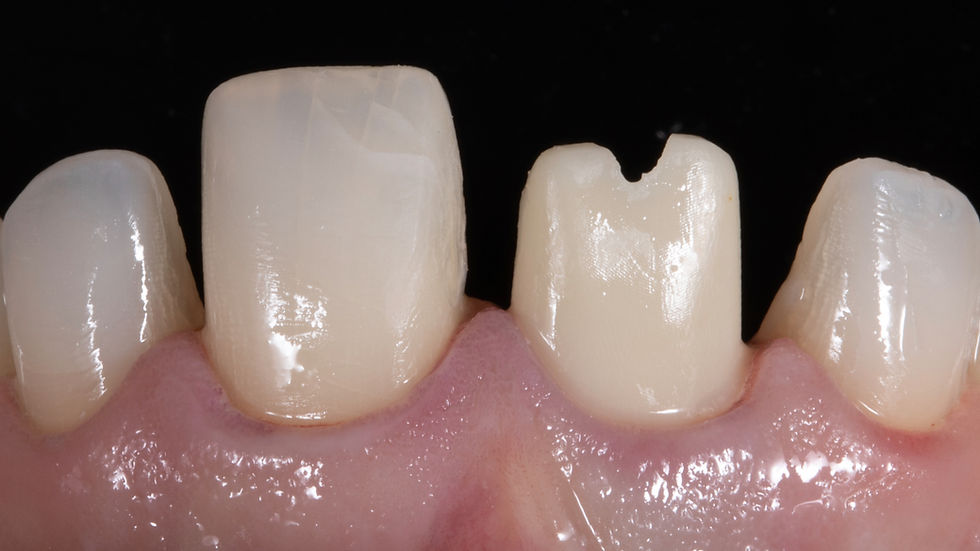
In this case, the patient presented with a PFM crown on #8 and wanted nothing more than to “fix the one tooth.” That made tooth #9 the template. Before beginning, decisions around the diastema and final margin position helped define the wax‑up and guided the surgeon’s plan. With a thin facial plate, a socket‑shield technique preserved the facial root fragment to maintain volume and gingival architecture—critical for creating a natural emergence.

Provisional First, Everything Else Second
The immediate provisional was shortened slightly and kept out of occlusion. Looking back, the cervical neck should have been a touch wider, because the final will always reflect the provisional. When you’re restoring a single tooth, the prototype must be exact before any records are captured.
Give the Lab What They Need to Match One Tooth
Matching a single central requires disciplined records. Straight-on images with balanced lighting provide baseline information, while low‑exposure, chin‑down photos reveal the incisal translucency that often gets washed out. Additional 45‑degree and profile views help the technician read surface anatomy and halo.

Shade communication starts with arranging the VITA guide by value and holding multiple tabs on the same plane as the tooth. Capturing a series with and without a polarized lens gives the lab a complete picture of both internal color and surface reflection. Systems like eLab can elevate this further by generating a formulaic build‑up recipe—even if your technician isn’t using eLab, the photography principles still apply.
Capturing the Emergence Profile
Whether analog or digital, the goal is the same: deliver the exact subgingival contour validated by your provisional. Analog indexing in a small impression cup or digital scans of the provisional (in and out of the mouth) both let the lab design the abutment and crown with precision. Tinting the abutment toward a dentin-like shade helps prevent value shift in a single‑tooth case.
The final restoration blended beautifully, and the patient was thrilled. The only improvement would have been refining the provisional’s cervical width before sending records—an easy reminder that the provisional sets the blueprint for everything that follows.

Three Key Takeaways from This Case:
Start with the finish line. Define margins, scallop, and incisal position early so the surgical and restorative plans align.
Perfect the provisional. The final restoration will mirror whatever you capture—make sure the prototype is right.
Overcommunicate shade and contour. Multi‑angle photos, value‑based shade tabs, polarized images, and accurate emergence records give the lab what they need to match a single central.
If you want to see the full workflow and step‑by‑step techniques behind this case, watch the complete clinical video, Single‑Tooth Restorations: Overcoming Challenges.

Members:
Not a member?
The Case Continuum gives you access to ongoing case discussions and focused clinical lessons that show how decisions are made—step by step.
Plan with clarity, execute with confidence, and deliver predictable results. I’m not only teaching techniques—I’m showing you exactly how to think through clinical challenges, month after month.